Troubleshooting

Sprayer isn't building pressure? Hose is leaking at the tank? Let us help you troubleshoot your sprayer issues.

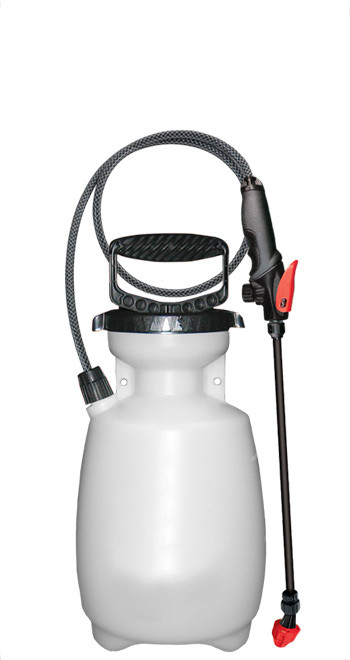
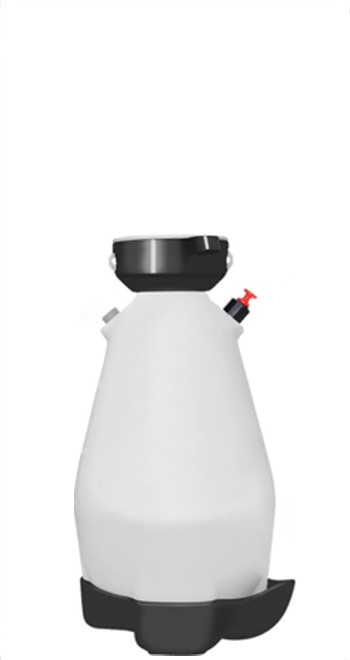
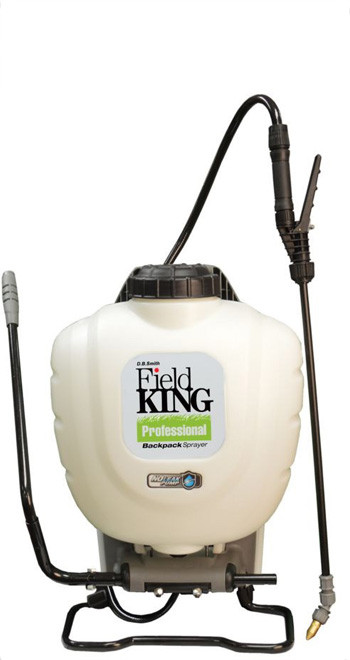
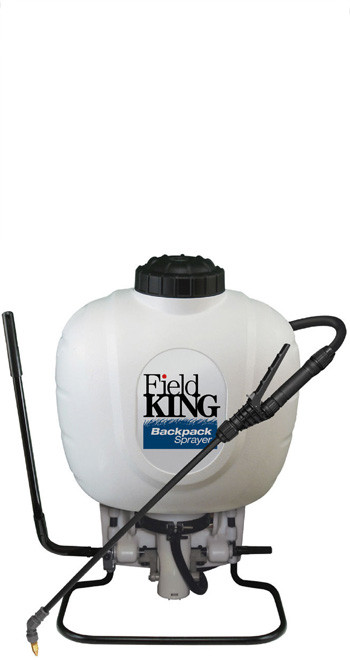
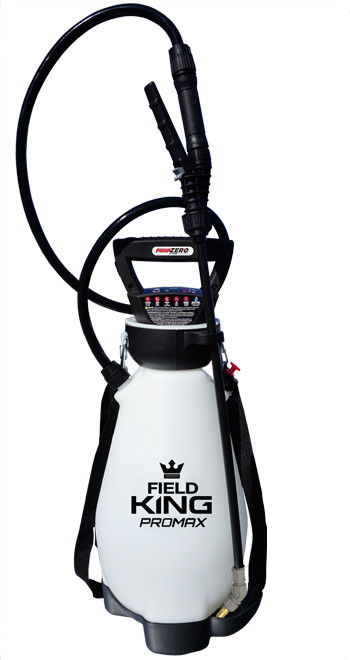
Click the tank image for troubleshooting information.

ML & O Tanks

  1. Loose hose. One of the common causes is not having the hose installed properly. Remove the hose from the tank. Most sprayers have a hose barb (2 plastic, white tabs) located at the end of the hose under the hose nut. Reinsert the dip tube into the tank making sure to align the hose barb with the cut outs (see picture below). Push the tabs down into the notches until they cannot go any further. Then hand tighten the hose nut onto the tank - being careful not to cross thread or overtighten. (NEED TO INSERT VIDEO) If your sprayer does not have a hose barb, you can just reinsert the dip tube into the tank and hand tighten the hose nut as described previously.
  2. Inspect the pump gasket. Depressurize the sprayer and remove the pump from the tank. The pump gasket is located at the top of the pump right above the threads (see picture below). Remove the dirt or debris from the gasket and pump threads by wiping with a clean cloth. Then lubricate gasket with a light oil (i.e., 3-IN-ONE® Multi-Purpose Oil) to keep gasket from drying out. Replace pump in tank and hand tighten until it is snug. Do not overtighten as it can cause damage to the gasket. NOTE: If you notice the gasket is chipped, torn, swollen or misshaped, it will need to be replaced by ordering a pump service kit.*
  3. Inspect the pump check valve. With the pump removed, locate the check valve at the bottom of the pump. Make sure there is no dirt or debris underneath the check valve. It can be easily removed, washed and put back into place. If you notice it is damaged or worn, it will need to be replaced by ordering a pump service kit.*
  4. Inspect pump piston o-ring. Again, have the pump removed from the tank. You will be separating the pump piston from the pump barrel. First pull the pump handle up until it cannot go any further. Then use a flat screwdriver to push the tabs in on both sides of the pump cylinder and pry up. At the end of the plastic piston/rod, there will be a black o-ring. Periodically this o-ring needs to be lubricated with a heavy coating of petroleum jelly to ensure a nice tight seal in the pump barrel - delivering as much air as possible per stroke. If you find this o-ring seal to be worn, damaged, or swollen, it will need to be replaced by ordering a pump service kit.*

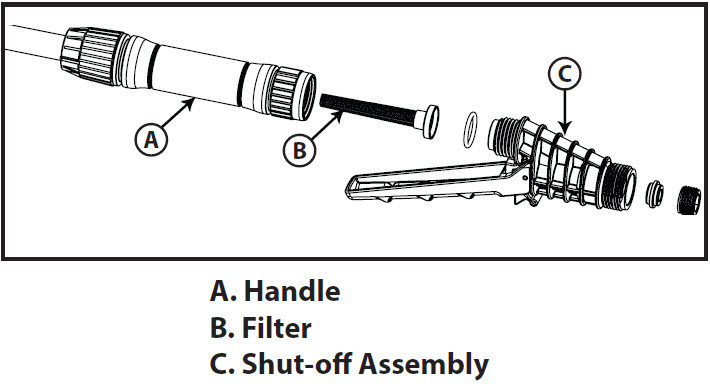
The shut-off lock might be engaged. Squeeze shut-off handle (red, yellow, or green), then slide it back towards the sprayer to disengage the lock. The handle should pop up to stop the spraying. If this does not fix the issue, the shut-off assembly might need to be replaced.*

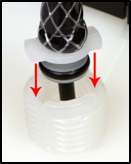
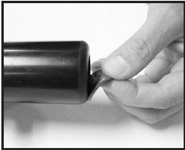
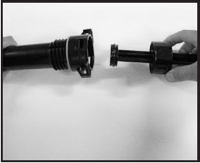
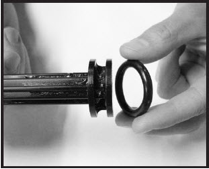
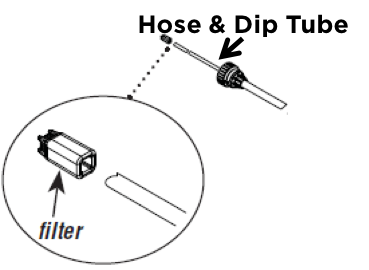
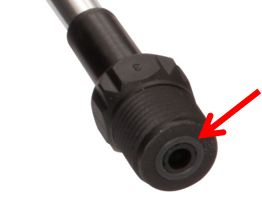
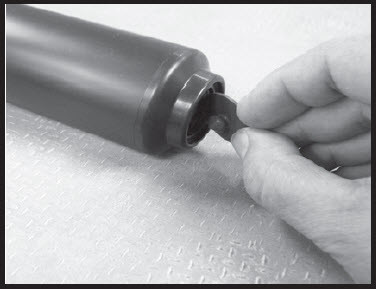
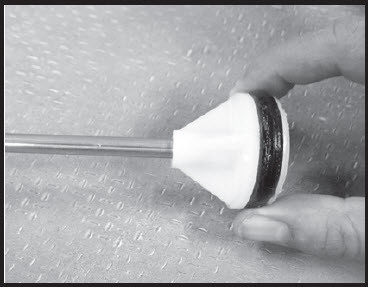
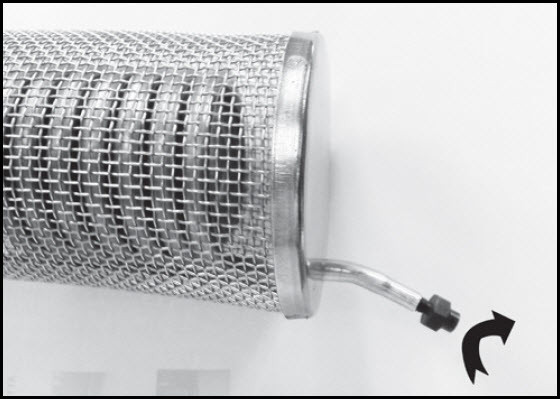
There may be dirt or debris stuck under the pump check valve. Remove the pump from the tank and locate the check valve at the bottom of the pump. It can be easily removed, washed and put back into place. If you notice it is damaged, worn, or misshaped, it will need to be replaced by ordering a pump service kit.*

  1. Loose hose. One of the common causes is not having the hose installed properly. Remove the hose from the tank. Most sprayers have a hose barb (2 plastic, white tabs) located at the end of the hose under the hose nut. Reinsert the dip tube into the tank making sure to align the hose barb with the cut outs (see picture below). Push the tabs down into the notches until they cannot go any further. Then hand tighten the hose nut onto the tank - being careful not to cross thread or overtighten. (NEED TO INSERT VIDEO) If your sprayer does not have a hose barb, you can just reinsert the dip tube into the tank and hand tighten the hose nut as described previously.
  2. Cracked, swollen or faulty hose. If the hose becomes cracked or swollen, it will need to be replaced by ordering a shut-off assembly.* Note: The hose cannot be removed from the shut-off.
  1. Too much liquid in the tank. The sprayer has raised fill markings on the side of the tank - only fill to the max fill line. This will allow enough room in the tank for the air/pressure needed to allow the sprayer to function properly.
  2. Inspect pump piston o-ring. f you are having a hard time pumping the sprayer, you could have a damaged piston o-ring. Again, have the pump removed from the tank. You will be separating the pump piston from the pump barrel. First pull the pump handle up until it cannot go any further. Then use a flat screwdriver to push the tabs in on both sides of the pump cylinder and pry up. At the end of the plastic piston/rod, there will be a black o-ring. Periodically this o-ring needs to be lubricated with a heavy coating of petroleum jelly to ensure a nice tight seal in the pump barrel - delivering as much air as possible per stroke. If you find this o-ring seal to be worn, damaged, or swollen, it will need to be replaced by ordering a pump service kit.*

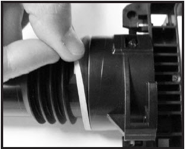
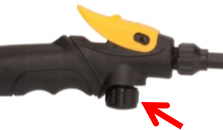
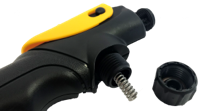
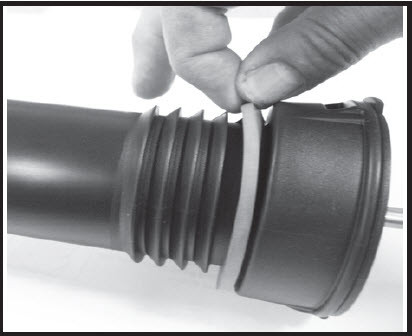
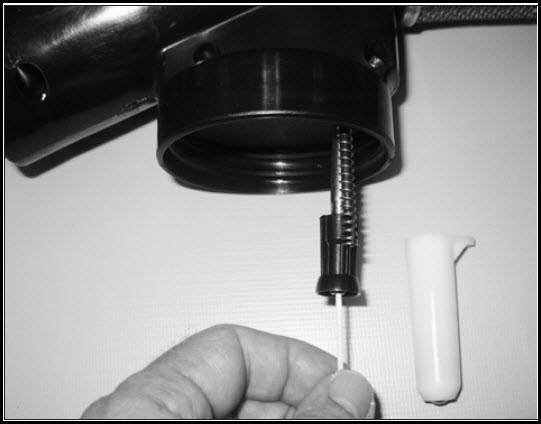
There may be dirt or debris in the shut-off valve, which is located inside the handle. Loosen and remove the black knob on the bottom of the shut-off. You might need a pliers to loosen it initially. Remove the spring and flush water through the opening to remove any blockage that might be present. If this does not fix the issue, the shut-off assembly will need to be replaced.*

  1. Substance is too thick for the sprayer. These sprayers are not designed to spray liquids with thicker viscosities (i.e., paint, stains, some sealers, etc.). They are ideal for herbicides, insecticides, pesticides, fungicides, fertilizers, and other chemicals with the consistency of water (Caution: Never use flammable liquids, caustics, acids, or hot water in these sprayers.) Please contact our customer service if you have a question regarding a specific chemical.
  2. Sprayer wand or nozzle is clogged. Remove the nozzle from the wand. Flush wand, shut-off and nozzle with clean, cold water. NOTE: The all-in-one nozzle cannot be taken apart. If clogged, the nozzle will need to be replaced.*
  3. Dip tube filter clogged. If your sprayer is equipped with a filter at the end of the dip tube, it can be removed and cleaned. Simply loosen the hose nut and pull the dip tube out of the tank. Remove the filter and flush out with clean, cold water.
  4. O-Ring is missing from the end of the wand. Remove the nozzle from the wand. Check to make sure there is an o-ring (color may vary) at the end of the wand. If it is missing and cannot be located, the o-ring can be replaced by ordering the Roundup® Parts Repair Kit.*

R Tanks

  1. Loose hose. Inspect the connection to ensure it is not cross threaded, and then hand tighten the hose nut.
  2. Inspect the pump gasket. Depressurize the sprayer and remove the pump from the tank. The pump gasket is located at the top of the pump right above the threads (See Figure 2). Remove the dirt or debris from the gasket and pump threads by wiping with a clean cloth. Then lubricate gasket with a light oil (i.e., 3-IN-ONE® Multi-Purpose Oil) to keep gasket from drying out. Replace pump in tank and hand tighten until it is snug. Do not overtighten as it can cause damage to the gasket. NOTE: If you notice the gasket is chipped, torn, swollen or misshaped, it will need to be replaced by ordering a pump service kit.*
  3. Inspect the pump check valve. With the pump removed, locate the check valve at the bottom of the pump (See Figure 3). Make sure there is no dirt or debris underneath the check valve. It can be easily removed, washed and put back into place. If you notice it is damaged or worn, it will need to be replaced by ordering a pump service kit.*
  4. Inspect pump piston o-ring. After you have removed the pump from the tank, you will need to separate the pump piston from the pump barrel. Squeeze the tabs on the cap and pull away from the barrel (See Figure 4). At the end of the metal piston/rod, there will be an o-ring (See Figure 5). Periodically this o-ring needs to be lubricated with a heavy coating of petroleum jelly to ensure a nice tight seal in the pump barrel - delivering as much air as possible per stroke. If you find this o-ring seal to be worn, damaged, or swollen, it will need to be replaced by ordering a pump service kit.*
  1. Shut-off lock is partially engaged. Squeeze shut-off lever all the way down and push the trigger lock towards the nozzle to unlock (See Figure 6).
  2. Dirt or debris in the shut-off valve. The valve is located inside the handle, so the first step is to depressurize the sprayer and release all liquid from the wand. Then unscrew and remove the shut-off assembly from the black rubber grip and hose (See Figure 7). It will come apart right above the section that reads "FILTER". Remove the white filter inside the handle and flush with clean, cold water to remove any debris. Then flush cold water through the shut-off poppet (metal rod located within yellow nut). Press the shut-off lever (like you would as if you were spraying) for the poppet to open and allow the water to flow through. Lastly run cold water through the handle and hose.
  3. Damaged o-ring or seal in shut-off. If the steps above haven't solved the issue, the o-rings or seals could be damaged and need to be replaced by ordering the shut-off service kit. *

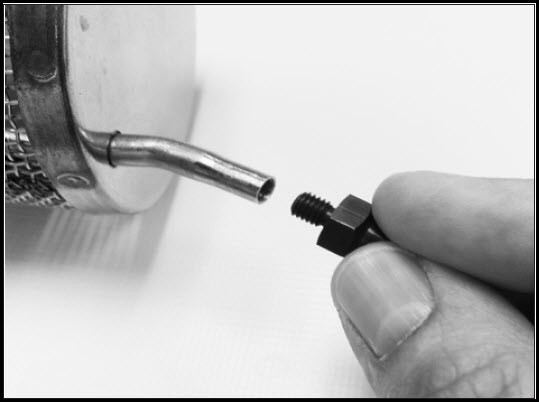
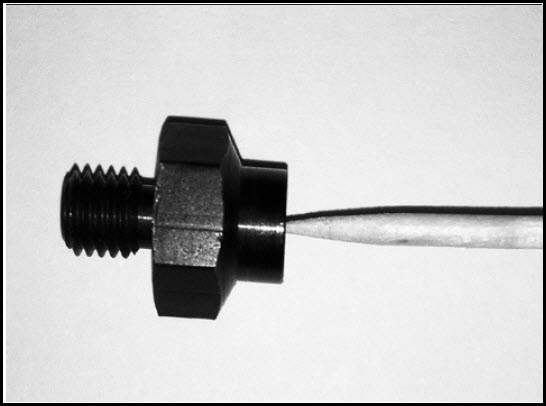
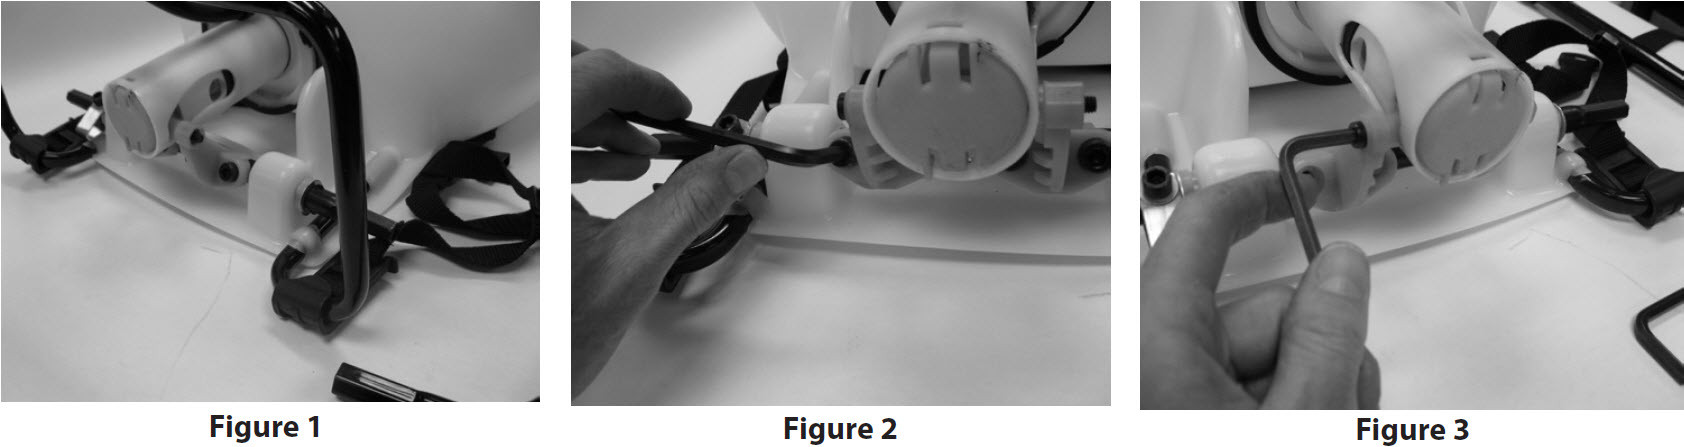
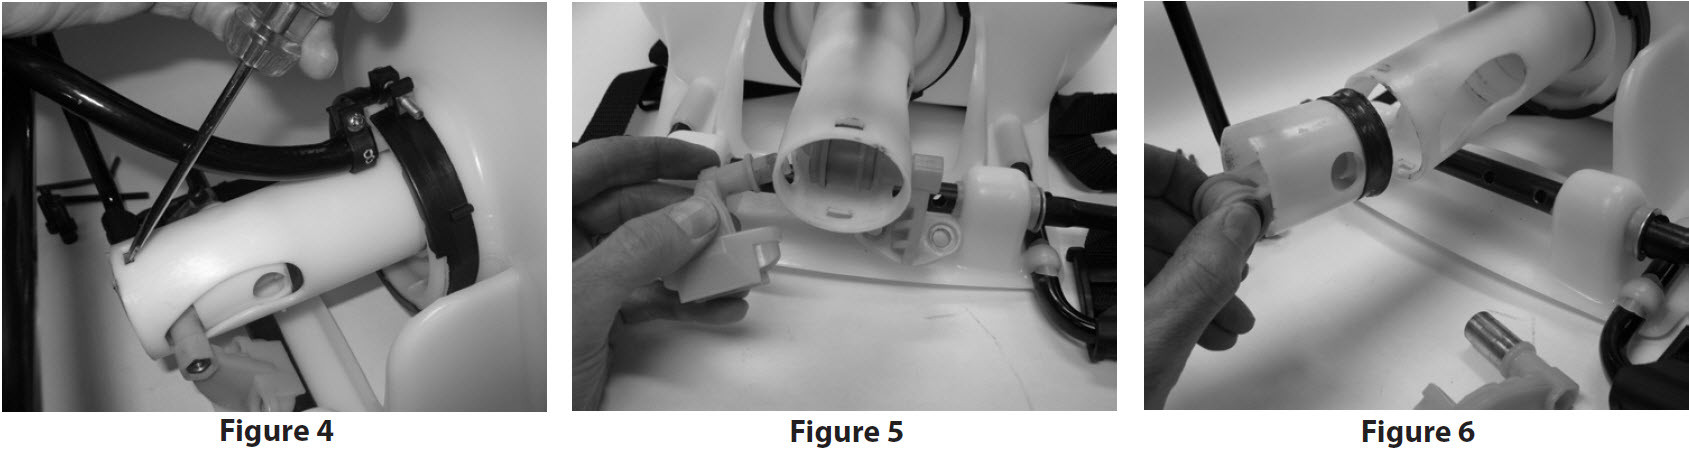
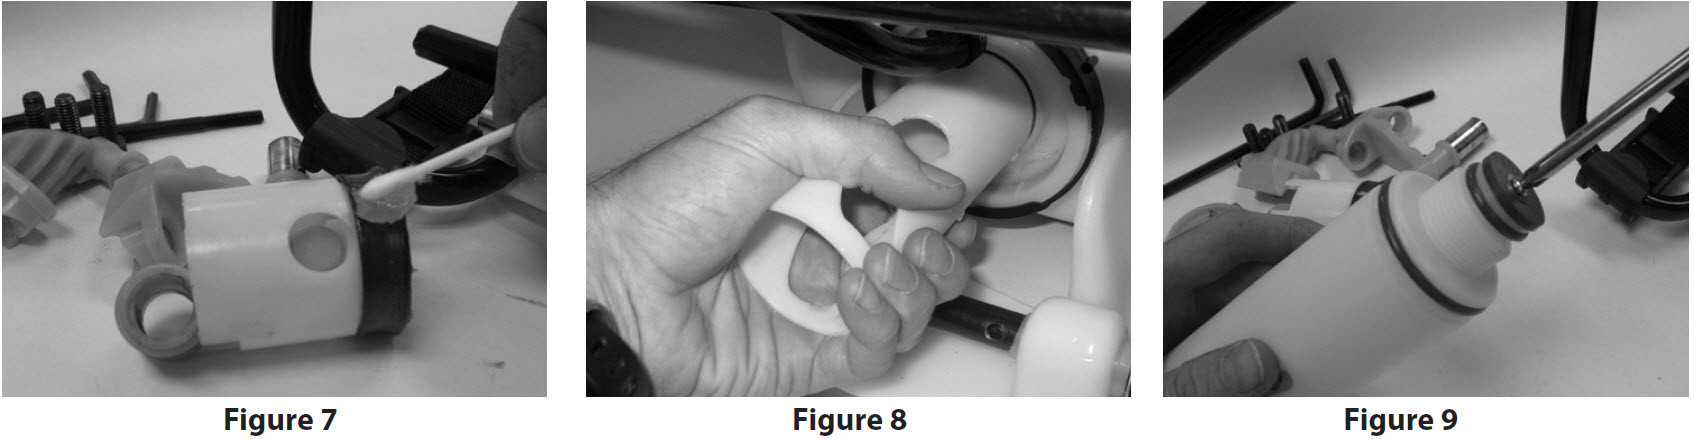
Inspect the pump check valve. Depressurize the sprayer and remove pump from the tank. Locate the check valve at the bottom of the pump (See Figure 3). Make sure there is no dirt or debris underneath the check valve. It can be easily removed, washed and put back into place. If you notice it is damaged or worn, it will need to be replaced by ordering a pump service kit.

  1. Loose hose. Inspect the connection to ensure it is not cross threaded, and then hand tighten the hose nut.
  2. Cracked, swollen or faulty hose. If the hose becomes cracked or swollen, it will need to be replaced by ordering a shut-off assembly *Note: The hose cannot be removed from the shut-off, so it will also need to be replaced.

  1. Too much liquid in the tank. The sprayer has raised fill markings on the side of the tank - only fill to the max fill line. This will allow enough room in the tank for the air/pressure needed to allow the sprayer to function properly.
  2. Inspect pump piston o-ring. Depressurize the sprayer and remove the pump from the tank. You will need to separate the pump piston from the pump barrel. Squeeze the two tabs on the cap and pull away from the barrel (See Figure 4). At the end of the metal piston/rod, there will be an o-ring (See Figure 5). Periodically this o-ring needs to be lubricated with a heavy coating of petroleum jelly to ensure a nice tight seal in the pump barrel - delivering as much air as possible per stroke. If you find this o-ring seal to be worn, damaged, or swollen, it will need to be replaced by ordering a pump service kit.*
  1. Substance is too thick for the sprayer. These sprayers are not designed to spray liquids with thicker viscosities (i.e., paint, stains, some sealers, etc.). They are ideal for herbicides, insecticides, pesticides, fungicides, fertilizers, and other chemicals with the consistency of water (Caution: Never use flammable liquids, caustics, acids, or hot water in these sprayers.) Please contact our customer service if you have a question regarding a specific chemical.
  2. Flat seal (for flat fan tips) is missing or damaged. Remove the nozzle from the wand and then remove the flat fan tip from the cap nut. Make sure there is a flat seal at the bottom of the cap nut. If it is missing or damaged, it can be ordered with the poly nozzle kit or the brass nozzle kit.*
  3. Sprayer wand or nozzle is clogged. Remove the nozzle from the wand. Flush wand, shut-off and nozzle with clean, cold water.
  4. Dirt or debris in the shut-off valve. The valve is located inside the handle, so the first step is to depressurize the sprayer and release all liquid from the wand. Then unscrew and remove the shut-off assembly from the black rubber grip and hose (See Figure 7). It will come apart right above the section that reads "FILTER". Remove the white filter inside the handle and flush with clean, cold water to remove any debris. Then flush cold water through the shut-off poppet (metal rod located within yellow nut). Press the shut-off lever (like you would as if you were spraying) for the poppet to open and allow the water to flow through. Lastly run cold water through the handle and hose.

S1 Backpacks

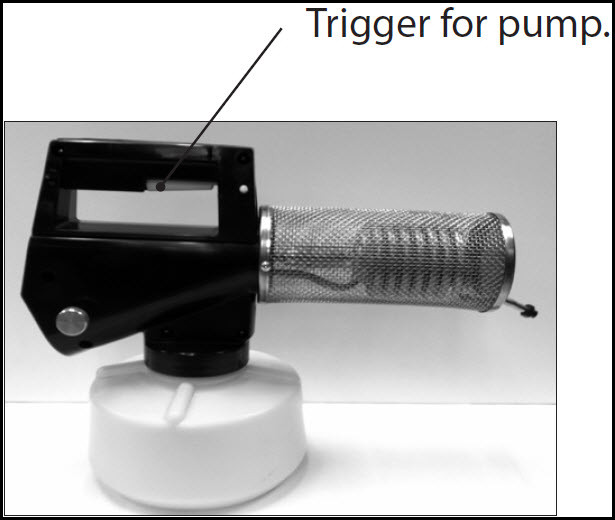
Prior to performing any maintenance or repairs, empty the contents in the tank. Pump any remaining fluid out of the pump. Lock trigger and spray all fluid out of shut-off until all fluid and air pressure has been expelled.

  1. Inspect piston seal on pump. Follow the directions under "Servicing Your Backpack Sprayer" to determine if the piston seal is damaged and needs replacing. If it needs to be replaced, we offer a piston seal kit.*
  2. Pump cylinder washer may be dirty or damaged. Fill the tank with clean water and flush pump to remove any debris from the pump cylinder washer. If this does not fix the issue, you will need to replace the pump cylinder washer which is included in the piston seal kit.*

  1. Inspect piston seal on pump. Follow the directions under "Servicing Your Backpack Sprayer" to locate the piston seal. The seal should be periodically cleaned and recoated with a heavy coating of petroleum jelly to ensure a tight seal within the cylinder. If the piston seal appears to be worn or damaged, it will need to be replaced by ordering the piston seal kit.*
  2. Damaged or worn o-ring(s). Follow the directions under "Servicing Your Backpack Sprayer" to locate the o-rings on the pump cylinder. During Step 9, if the o-rings appear worn or damaged, they will need to be replaced by ordering the piston seal kit.*

  1. Sprayer wand or nozzle is clogged. Remove the nozzle from the wand. Flush wand, shut-off and nozzle with clean, cold water.
  2. Dirt or debris in the shut-off valve. The valve is located inside the handle, so the first step is to depressurize the sprayer and release all liquid from the wand. Then unscrew and remove the shut-off assembly from the black rubber grip and hose. It will come apart right above the section that reads "FILTER". Remove the white filter inside the handle and flush with clean, cold water to remove any debris. Then flush cold water through the shut-off poppet (metal rod located within yellow nut). Press the shut-off lever (like you would as if you were spraying) for the poppet to open and allow the water to flow through. Lastly run cold water through the handle and hose.

Worn or damaged piston seal on pump. Follow the directions under "Servicing Your Backpack Sprayer" to locate the piston seal. It will need to be replaced by ordering the piston seal kit.*

  1. Pump cylinder washer is sticking. Follow the directions under "Servicing Your Backpack Sprayer" to locate the pump cylinder washer. If the washer is dirty, simply clean with clean, cold water. If the washer is damaged, it will need to be replaced by ordering the piston seal kit.*
  2. Check valve hole in the tank cap is clogged. Remove the tank cap from the sprayer. Simply remove the check valve seal and rinse the cap and valve with clean, cold water. If it appears to be worn or damaged, it will need to be replaced by ordering the piston seal kit.*
  3. Permanent filter in pressure cylinder is clogged. Please follow the directions under "Servicing Your Backpack Sprayer" to remove the clog in the filter.

  1. Position pump handle all the way up, placing the piston in the down stroke to allow access to the screws retaining the crank arms.
  2. Remove the pump handle (see Figure 1). Remove the 4 screws securing the crank arm to the drive shaft using a 6mm Allen Wrench (see Figure 2).
  3. Next remove the screw that secures the crank arms to the drive links using a 5mm Allen Wrench (see Figure 3).
  4. Remove the pump cover by inserting a flat head screwdriver into the lower snap windows of the pump cylinder (see Figure 4).
  5. Withdraw the crank arms from the drive link through the side of the pump cylinder (see Figure 5).
  6. Now the drive link and piston assembly can be removed straight down through the bottom of the pump cylinder (see Figure 6).
  7. The piston cup and cylinder walls should be periodically cleaned and recoated with fresh petroleum jelly. Take note of any tears or scratches and replace as needed. Take care to guide the piston cup past the side openings in the pump cylinder when reinstalling (see Figure 7).
  8. You will need the piston seal kit to rebuild the pump cylinder assembly. First remove the pump cylinder by unscrewing it counterclockwise (see Figure 8).
  9. Use a Phillips head screwdriver to remove and discard the pump cylinder washers, saving the screw and stainless steel washers. Replace with new. Do not grease pump cylinder washers. Inspect o-rings for wear and replace with new and/or lubricate with petroleum jelly (see Figure 9).
  10. To reinstall the pump cylinder, rethread into the pressure cylinder until the large o-ring is not visible then continue turning until the tab and notch align (see Figure 10).
  11. To replace the pressure cylinder o-ring, remove the pressure cylinder by loosening and removing the clamp ring that retains the pressure cylinder. Use a block of wood for a punch to drive the pressure cylinder out of the bottom tank opening. Withdraw the pressure cylinder and remove the old o-ring. Clean the seal groove and mating tank surface with a soft cloth. Replace the o-ring and coat with petroleum jelly (see Figure 11).
  12. To reinstall pressure cylinder first warm the bottom tank opening by running it under hot tap water. This will ensure that the pressure cylinder seal is seated properly. Take care not to roll the o-ring seal out of the groove as you reinsert the pressure cylinder. Realign the tab on the tank with the notch on the pressure cylinder and make sure the flange on the pressure cylinder is flush with the flange on the tank. Reassemble the clamp ring and tighten. (See Figure 12)

S2 Backpacks

Battery Backpacks

Burgess Propane Fogger

  1. Nozzle and/or end of coil obstructed or clogged. Remove and clean nozzle orifice (see Figures 1 & 2). Remove carbon build-up from inside the coil if necessary (see Figure 3).
  2. Pump plugged. Insert a small wire or toothpick into the hole at bottom of piston assembly to clean obstruction (see Figure 4). If this doesn't fix the issue, the pump assembly will need to be replaced.*
  3. Piston is worn. The piston will need to be replaced by ordering the piston assembly pump parts kit.
  4. Improper fogging material. Use only Black Flag, Cutter, or Repel branded fogging insecticide.
  1. Propane cylinder low or empty. Replace with new propane cylinder (see Figure 5).
  2. Propane cylinder attached improperly. Make sure there is no dirt or debris on the orifice (where the propane goes into the back of the tank) or the propane cylinder itself. Screw in the propane cylinder securely (see Figure 5) being careful not to cross thread. Hand tighten only. NOTE: We recommend using a 14.1 oz., tall style propane cylinder.
  3. Burner assembly fails to light or will not say lit. Please contact us at 1-800-311-9903 as the burner assembly will need to be replaced. Unfortunately it is not customer serviceable.
  1. Improper fogging material. Use only Black Flag, Cutter, or Repel branded fogging insecticide.
  2. Fog is thin or yellowish. The pumping rate is too slow; therefore, increase your pumping speed to once every 3-4 seconds.
  3. Fog is wet and dripping from nozzle. It's very important to allow the fogger to preheat at least 2 minutes before starting to fog. If you have already done this and the fog is still dripping, simply wait an additional 15 seconds. In addition, you might need to decrease your pumping rate to once every 3-4 seconds to give the insecticide a chance to go through the heat-conducting coil and vaporize into a fog.

  1. Nozzle loose. Once fogger is cool to the touch, tighten nozzle securely (see Figure 6).
  2. Excessive insecticide output. Decrease your pumping speed to once every 3-4 seconds. (see Figure 7). Make sure the fogger is level to the ground. Pointing towards the ground can cause a flare up.
  3. Not at operating temperature. Make sure you have preheated the fogger for 2 minutes before starting to fog. If you did preheat the fogger, wait an additional 10-15 seconds before pumping.
  1. Fogger pointed toward the ground. Always operate your fogger level with the ground. Pointing the fogger towards the ground will cause the insecticide to rush through the coil and cause a flare up. If a flare-up occurs, turn off the propane and set the fogger on a level, non-flammable surface. If possible, remove the propane cylinder. Flames will disappear as soon as the excess insecticide is evaporated. Please contact us at 1-800-311-9903 to determine the cause.
  2. New propane cylinder or incorrect size cylinder. We recommend using a 14.1 tall style propane cylinder. New cylinders are more prone to flare-ups. If a flare-up occurs, turn off the propane and set the fogger on a level, non-flammable surface. If possible, remove the propane cylinder. Please contact us at 1-800-311-9903 to determine the cause.
  3. Insecticide ignited. Stop pumping the trigger immediately and turn propane valve off. Set fogger on a level, non-flammable surface. If possible, remove the propane cylinder. The flame will go out after excess insecticide is burned off. Please contact us at 1-800-311-9903 to determine the cause.

*If your sprayer is still under warranty, please contact our customer service at 1-800-311-9903 for replacement parts.

Need to order replacement parts?

Top